I was browsing one day looking for some interesting side projects with docker, and that's when I stumbled upon the post Ghost blog on docker in 5 mins written by docker captain Alex Ellis. Thanks to @alexellisuk, I was able to host my blog on my Raspberry Pi.The page you are viewing now is currently served from my Raspberry-Pi and published with ghost. cool eh? If you wondering what the heck is ghost, Ghost is a free, open source and a completely hackable publish platform.
In this first part of the post, I have detailed the steps I took to get my blog up and running. Please note that the steps I have used differ sightly from the ones outlined in Alex's post. I did not sue Alex's docker image. Instead, I used ghost's official for amr32v7.In Part-2 of the top,I will also list down the steps to configure your ghost blog and hence more than 5 mins!
Pre-requisites
- Raspbian Jessie installed. If you are new, you can find the installation instructions here.
- Raspberry Pi secured.Again, if you are new, you can simple but detailed instruction on securing your raspberry pi here.
- High level understanding of docker and docker commands.If you are new to Docker, check out my earlier post on getting started with Docker on Raspberry-Pi
Some of the commands can be run as non-root user but am using sudo anyway
Installation Steps
Step -1 : Prepare Raspberry-Pi
sudo apt-get upgrade && sudo apt-get upgradeStep -2 : Expand your filesystem your Raspberry-Pi
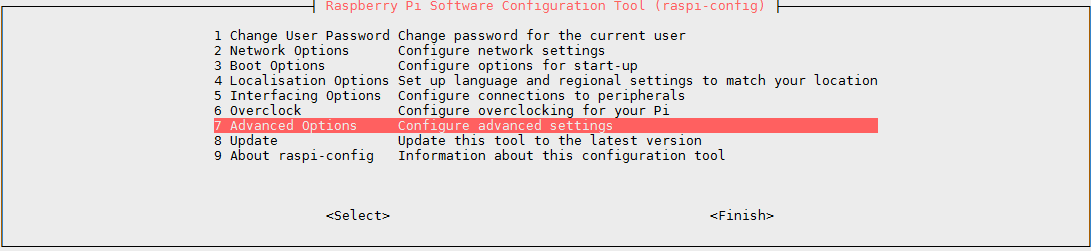
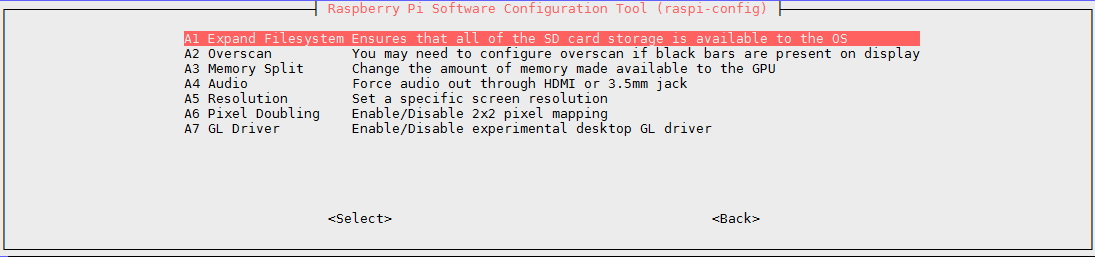
Choose "Advanced Options" and then the option "Expand Filesystem" as shown in the below screenshots.
sudo raspi-config
Step -3 : Reboot Raspberry-Pi
sudo reboot nowStep -4 : Install docker
sudo curl -sSL https://get.docker.com | shStep -5 : Enable docker
sudo systemctl enable dockerStep -6 : Add user to the docker group. Replace
sudo usermod -aG docker username Step -7 : Restart your Raspberry-Pi and start docker
sudo reboot now
sudo systemctl start docker
Now you are all set to use docker.Let's go ahead and set up ghost.
Step -8 : Create a volume container
docker create -v volume-name:/var/lib/ghost/content --name container-name arm32v6/alpine:latest
Here's an example.
docker create -v ghostvolume:/var/lib/ghost/content --name ghost-content arm32v6/alpine:latest
In the above step,you are creating a volume container to ensure data persistence.This also makes your life easier in maintaining the lifecycle of the container without losing your data. To learn more about container volumes check out the tutorials here.
Step -9 : Run and attach the container to the volume container you just created.
Here's an example
docker run -d -p preferred-port-number:2368 --restart unless-stopped -v volume=name:/var/lib/ghost/content --name container-name --volumes-from volume-container-name arm32v7/ghost:latestdocker run -d -p 2500:2368 --restart unless-stopped -v ghostvolume:/var/lib/ghost/content --name ghostblog --volumes-from ghostblog-content arm32v7/ghost:latestStep-10 : Check if the container is running.
You should be able to see your container with the status "up" and also the port number you had chosen.
sudo docker psStep-11 : Access the ghost blog from the browser.
Voila!You have your blog up and running. To access the admin portal use the admin url
http://localhost:port-number
In the next part, we will see how to set up cloudfare,google analytics and publish your blog.Meanwhile, it is important you review some of the key points outlined below.Happy blogging!!!
http://localhost:port-number/adminSome key points to remember:
1. Only docker images created for arm will work with Raspberry-Pi . You can explore them on Docker hub for arm
2. Use only official images publihsed on docker hub.
3. Refer docker cheat sheet for troubleshooting docker.
4. Ghost's Ghost slack channel is a great place to seek help with regards to set up.
References:
1. ghost on docker in 5mins