Earlier, I wrote a post on getting started with Docker on Raspberry-Pi through a couple of exciting projects.For hobbyists and curious cats like me that are exploring and learning docker, the docker CLI, though reasonably straightforward can be overwhelming at times. Also,it might dampen the initial excitement. This is where docker dashboards come to the rescue. This post will cover one of my favorite tools, Portainer. Portainer is a great tool not only to manage your docker environment but also to learn dockers.
Docker GUI
There are several options available for Docker GUI. If you would like to explore other available options, I suggest you check out the post from Chris Ward.
The article provides a comprehensive overview of several GUI options.Please note that not all options may work on Raspberry-Pi. The fantastic Docker pirates at Hypriot have created Kitematic for Raspberry-Pi. If you are running hypriot os, you may want to check out try this link.I am using Raspbian OS and couldn't find kitematic for the same.
What is Portainer?
Here's what their website says,
PORTAINER IS AN OPEN-SOURCE LIGHTWEIGHT MANAGEMENT UI WHICH ALLOWS YOU TO EASILY MANAGE YOUR DOCKER HOSTS OR SWARM CLUSTERS
It is truly a light weight tool and super easy to install and use.
Use the following commands to install Portainer.
docker volume create portainer_data
docker run -d -p 9000:9000 -v /var/run/docker.sock:/var/run/docker.sock -v portainer_data:/data portainer/portainer
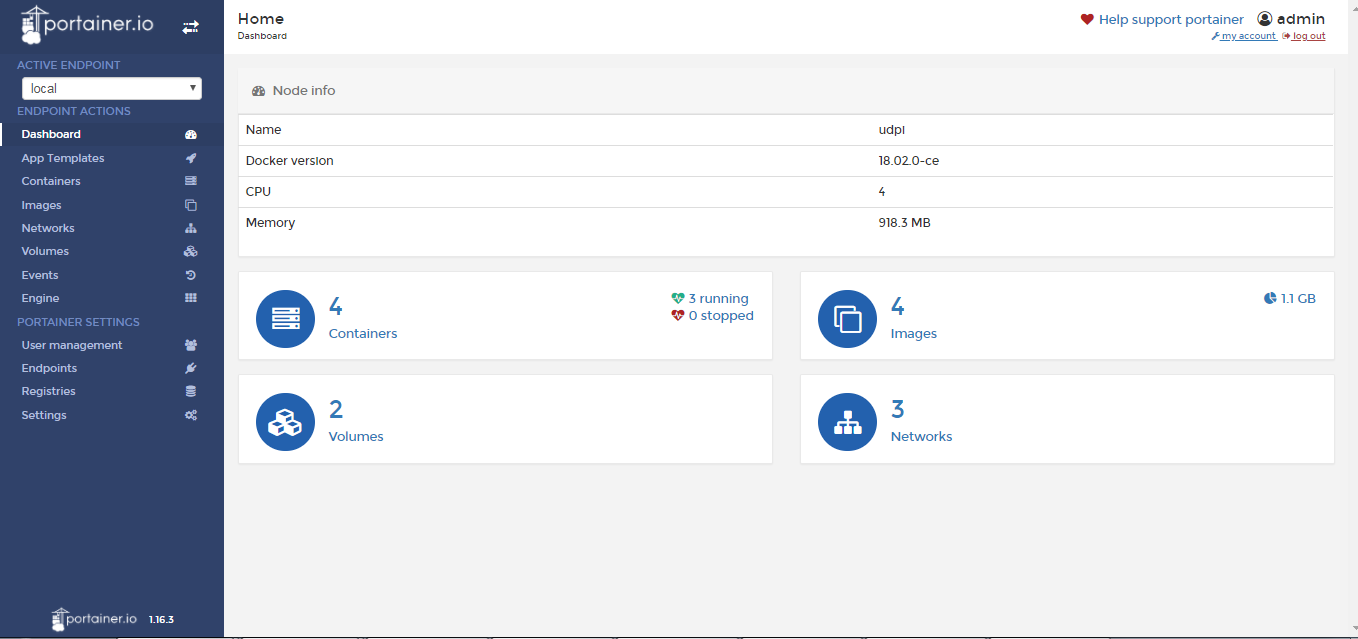
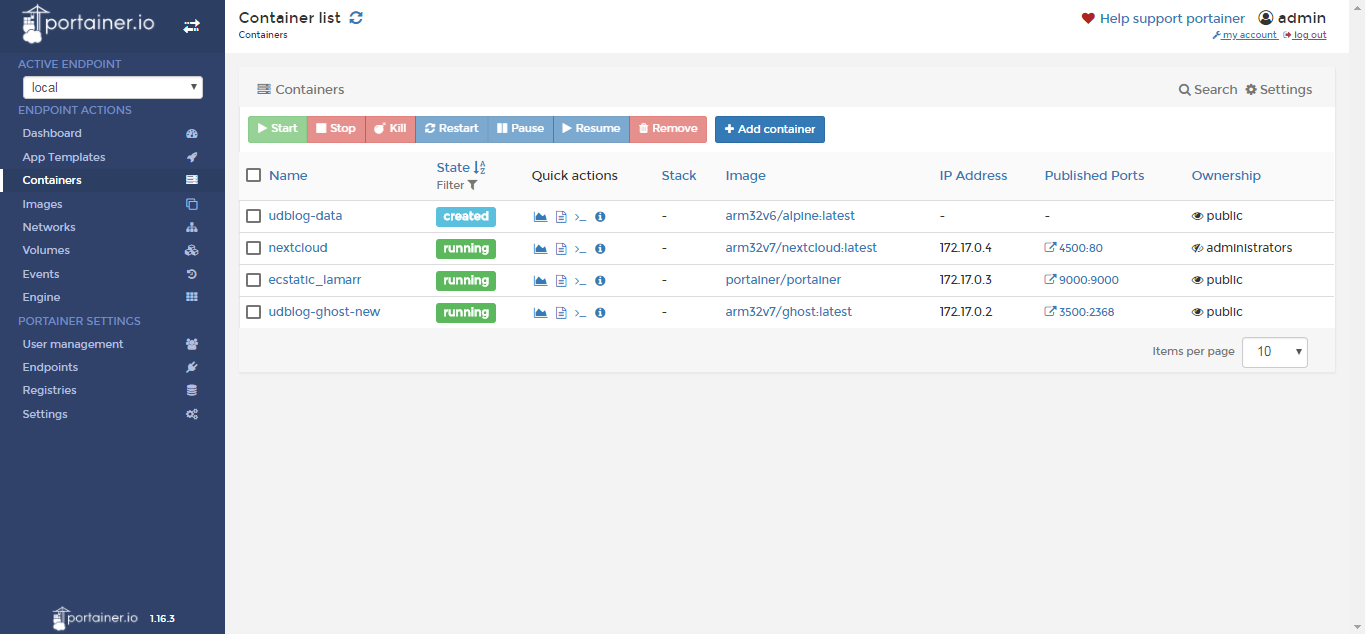
You are done! Yes, it's that simple. Now you can access the dashboard at http://localhost:9000 . Here are some screenshots that shows my docker environment

You can now explore the docker file easily to check where the application port is exposed, where the data is stored etc. In the below screen shot, you see that the Ghost application is exposed on Port 2368 and the data is stored in the path /var/lib/ghost/content
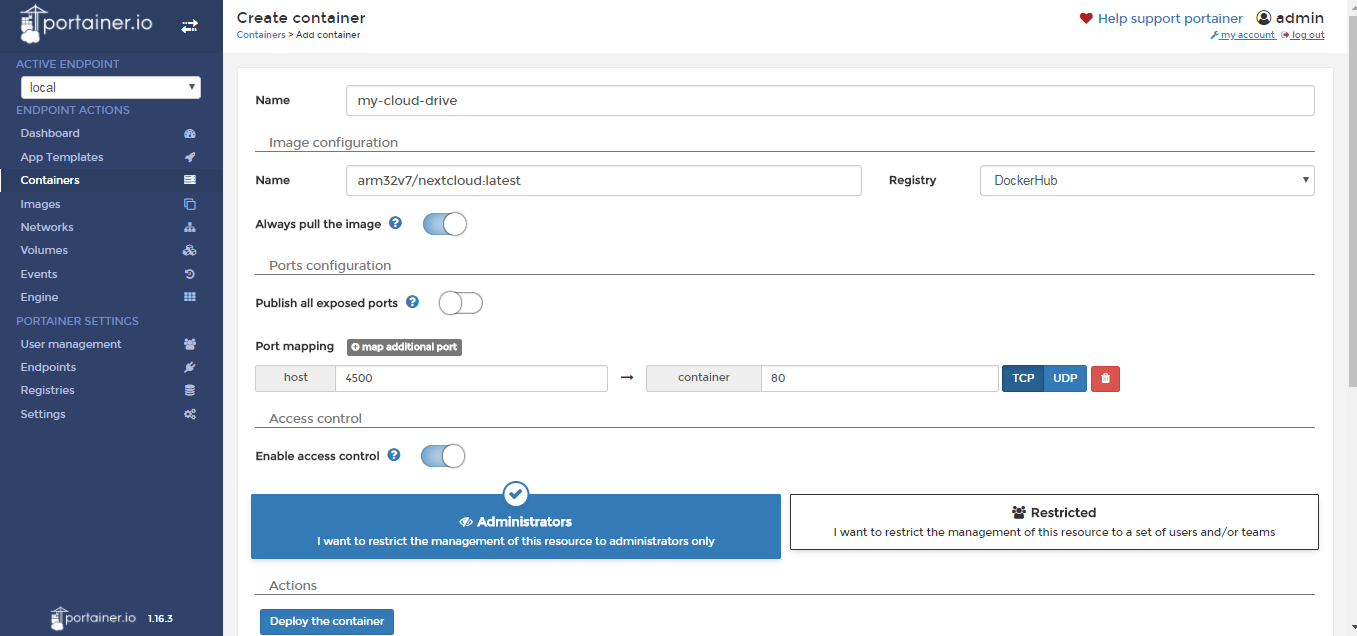
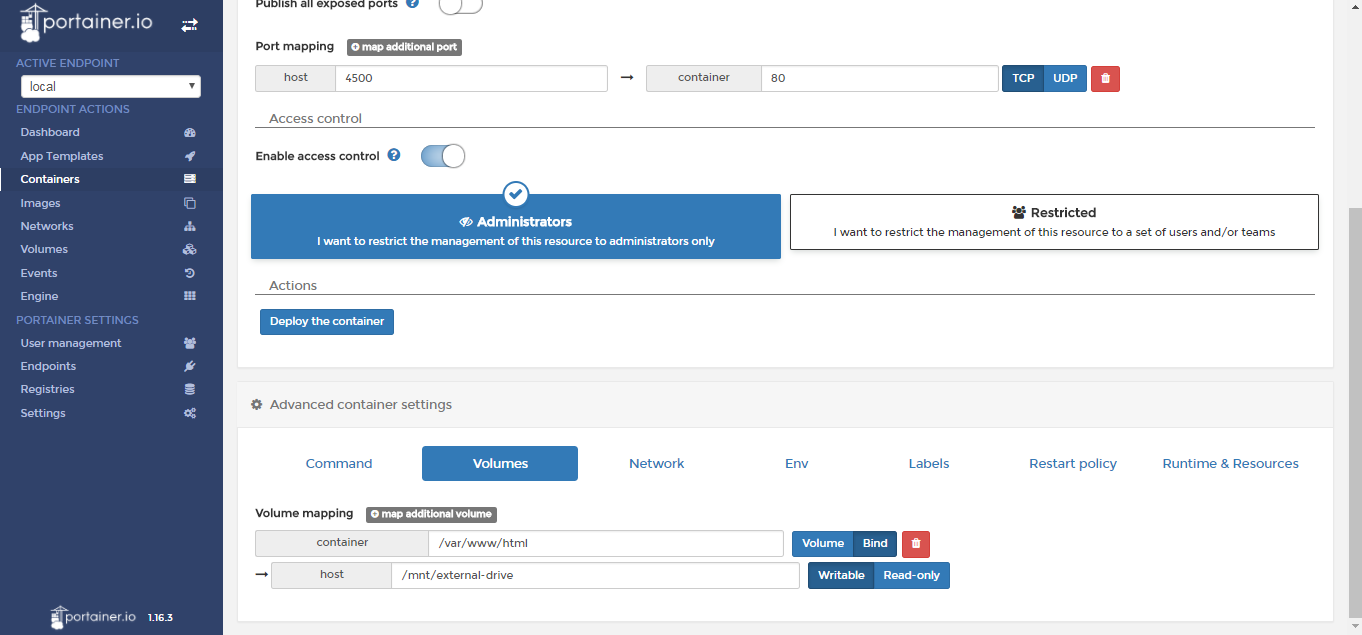
You can also use portainer to create new containers quite easily. In the earlier post I had laid down the steps to create nextcloud ( similar to Google Drive & Drop Box). You can create a new container but now bind it to an external drive instead of a volume container.Doing this on CLI can be a little tricky. Portainer GUI makes it a breeze. The screen shots below show the information you need to populate to create a new container. Once you populate the requisite information,hit deploy container and you are all set.
Happy learning!
Disclaimer : This post does not represent the thoughts,intentions, plans or strategies of my employer. It is solely my opinion.Feel free to challenge me, disagree with me and share your thoughts in the comments section